What is the Gate pose?
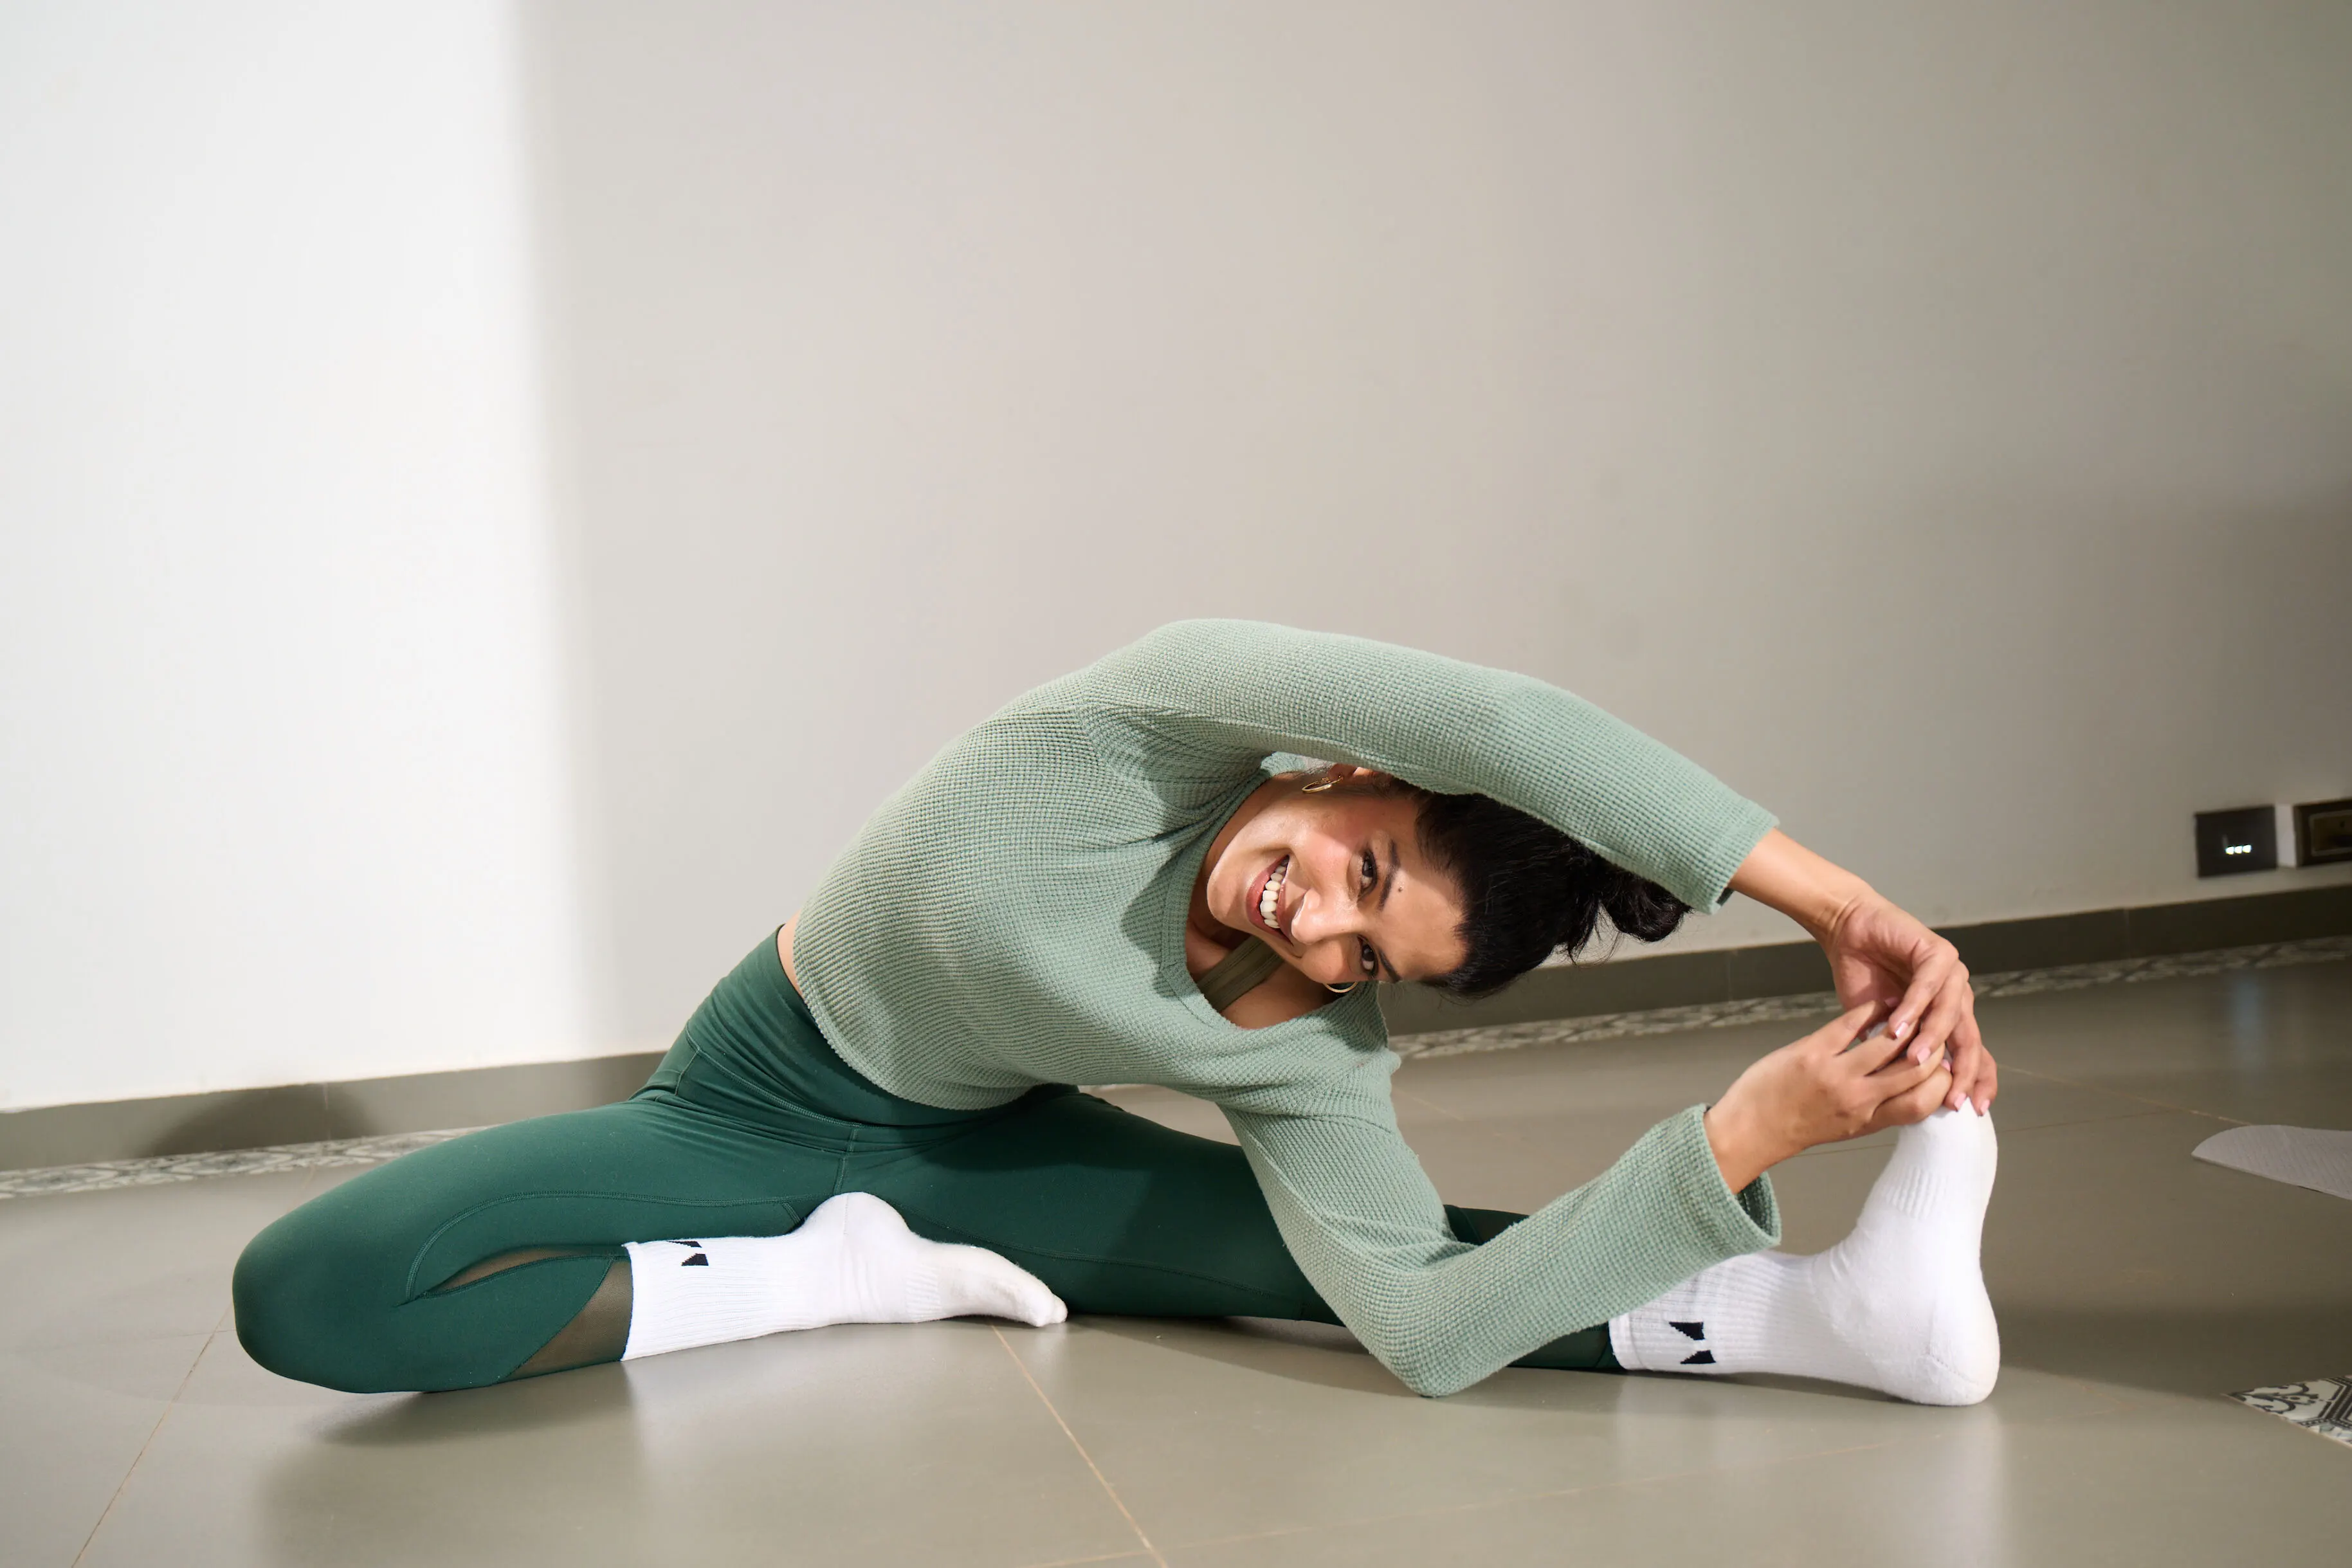
A lateral stretch, the Gate Pose, known as Parighasana, offers an invigorating stretch to the side of the body, impacting muscles that are otherwise neglected. In forward bends and backbends the side of the body, that is, muscles between the ribs, do not get any impact. Lateral bends, like the Gate pose, allow the body to create space, enhance oxygen and blood circulation to the region and release tightness.

Position type: Seated
Posture type: Lateral bend
Ideal for: Flexibility
Targets: Sides of the body, waist, inner thighs and hips
Pose level: Beginner
How to prepare for Gate Pose?
Gate pose is a beginner-level posture and can be practiced as a warm-up or during your stretches before more intense asanas and during an asana flow. Practicing the following will help you go deeper into the stretch as well as practice with ease.
Hip flexibility
Loosening up tight hamstrings allows you to access the Gate pose more effectively. Regular practice of hamstring stretches such as the Downward-facing dog pose, Standing Forward Fold, High Lunge, Low Lunge, Bound Angle Pose, Garland Pose, Bow Pose and Pigeon Pose are helpful.
.JPG)
Lateral bending
Practice simple side bends during your warm-ups to loosen up the waist and sides of the body. Simple stretches such as bending to each side while sitting or standing are good to start with. Poses such as the Triangle pose are also lateral bends which improve side stretches.
%20-min.jpg)
How to do Gate pose?
Getting into the posture
- Come into a kneeling position with your thighs perpendicular to the floor. The hips are over the knees.
- Now extend the right leg to the right side. Keep the knee and ankle in line with your right hip.
- Turn the right toes forward so that the right foot is parallel to the side of the mat.
- As you inhale, take the left arm over the left ear. Exhale and lean the torso to the right. Stretch the left arm over the head while doing this. Extend the right arm, bringing it down to rest on the right leg.
- Turn your gaze up, above the extended left arm. Keep the spine extended, and with every inhalation and exhalation deepen your stretch.
Getting out of the posture
- After staying in the pose for a few deep breaths, bring your left arm down, straighten your torso and bring the right knee back next to the left one.
- Repeat this on the left side.
Key alignments in the Gate pose
Ensure your chest remains open and torso in line with your thighs. The shoulders should not drop forward or compress the chest. Engage the core so that you avoid placing too much pressure on the knee. The weight should be evenly distributed and excessive on the hand that is resting on the leg.
What are the benefits of Gate pose?
The Gate pose stretches and lengthens the sides of the body, the waist, hips and inner thighs. The intercostal muscles between the ribs receive an impactful stretch. Very often due to poor posture, the intercostal muscles remain tight and stiff. Runners and cyclists also often face tightness in this region. Lateral stretches like the Gate pose are helpful in releasing that stiffness. The opening of the chest region also allows you to breathe deeply. It stimulates the lungs and abdominal organs too, and is great for improving balance. If you spend a long time sitting at a desk or getting ready for a full workout session, this is a good stretch to practice.
What are the contraindications of Gate pose?
Avoid practicing Parighasana if you are suffering from a recent knee, hip or shoulder injury. In the case of any back pain, do not stretch too much. Do a light stretch and only if comfortable deepen the stretch. Place a blanket under your knees if they are sensitive. In case of any neck discomfort, avoid looking up. Look straight ahead and towards the floor.
What are the counterposes of Gate pose?
Ensure you practice Gate pose on both sides so that both the left and right side get a balanced stretch. After Gate pose you can practice Child’s pose and Downward-facing dog pose.
Variations of the Gate pose
- If you have sensitive knees or are recovering from a knee injury, practice the chair version of the pose. Place the sit bones on the chair, feet flat on the floor or extend one leg to the side. Bend to the side, taking one arm over the head and the other stretched towards the foot.
- If you find it challenging to press your extended foot into the floor, use props such as a folded blanket under the heel or take wall support and press your foot against the wall.
Advice for beginners
- For better stability in the beginner, start by using the wall for your outstretched leg. You can also place your hand on a block instead of your leg in the beginning.
- Do a few simple hip stretches before attempting the Gate pose as it will loosen up and release tightness.
Shvasa tips
- Be gentle and start by practicing with a simple extension. Gradually you can deepen the stretch and extend further.
- Remember to always breathe deep and keep your awareness on the sides of the body, hips and thighs.


.jpg)


%201.png)

%201.svg)


%201.svg)